Wayno's Wishing Well
Presented by FWWA member Wayne Tentori at the August 2012 FWWA meeting.

First Step
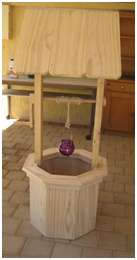
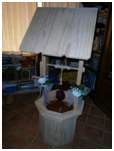
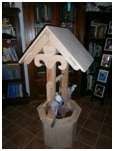
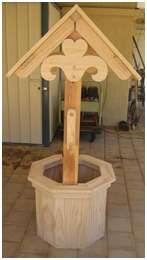
I made this wishing well for a wedding. The idea is that wedding guests can place their cards in the well at the reception.
My first step was to find a set of plans. I scoured the internet and found the following site: http://www.woodworkersworkshop.com/
A search on their site for a wishing well turned up the one I made. The plans cost $13.95 US and I got them within 10 days or so.
The plans were full scale and they suggested tracing all the parts directly onto the wood using carbon copy paper, which I found was a bit awkward. I ended up measuring and cutting most of the parts. Another technique I used was to photocopy parts of the plan, cut them out, spray adhesive onto them and stick them to the wood. I could then easily cut the shapes on my band saw.

Second Step
When I was making the octagonal walls of the well I went to Timbecon to look for a router bit that would cut a 22.5deg mitre. The salesman put me onto a Torquata “Birdsmouth” router bit.
These bits cut out a locking mitre joint, which is quite strong and is traditionally used for making masts. The bit I bought was for making eight sided shapes, but there are 6, 12 and 16 sided available. Details can be found at: http://www.timbecon.com.au/products/torquata- jointing-bits-435_0.aspx
Problems – and Practice makes Perfect
I took the bit home and practiced on some scrap wood. I just could not get the joint the same as what I saw in the shop. So I did a search on YouTube and found a great tutorial on using a birdsmouth bit by Dave Henry http://www.youtube.com/watch?v=7hmITWrn_jo
I watched it and realised that for 19mm stock a 5mm clearance between the base of the router and the start of the cutting area would give a flush fit.
Having a larger or smaller clearance would make one side of the fitting proud, which might be OK if you are going for a decorative effect.
Anyway, thanks to YouTube, I was in business.

More Problems
One of the problems was that the plans, being American, were all in feet and inches. This didn’t quite matter, but I did find myself jumping backwards and forwards from imperial to metric.
Luckily I had a good calculator that could convert into metric and a steel ruler with both types of measurement. I got into the habit of marking out most pieces in imperial then converting the measurement into metric and using that to double check my measurements.
A couple of times this saved miscutting pieces as I did struggle a bit with sixteenths and thirty-seconds. Overall, the measurements were not all that critical so I had a bit of leeway.

. . . and Final Success
All up the timber cost me around $130, which I bought from Masters in Bibra Lake. I was impressed with their selection of “budget” pine. It was a lot cheaper than the premium pine and not too knotty.
I thoroughly enjoyed making the well. It took a lot of sweat, some tears and yes, some blood but I had lots of fun and I learnt a great deal from the project.
Most of the stress was trying to get it finished in time for the wedding reception and apart from the bottom trimming and final sanding and sealing I got it done in time. The accolades I received at the wedding made me feel proud of myself and gave me a great sense of achievement.
Woodworking is a great hobby.
