Something for Eveyone
It is always enjoyable when we have a joint meeting with Lake Monger Community Shed, I think it is the different group of people and venue that all adds up to a vibrant atmosphere where everyone wants to learn something new.
Carolyn and Andy welcomed everyone to our joint meeting and invited us all to inspect the amazing facilities that they have here.
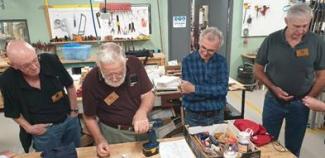
As before we were running a round-robin meeting tonight which means that every 20 minutes, just as you get to the bit you wanted to know about, someone will harass you to move on to the next station.
Station No 1
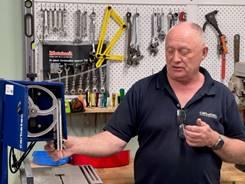
We were incredibly lucky to have Graham MacKellar from Carbatec with us tonight who provided a very insightful session on the correct setup of a bandsaw.
Almost every workshop has a bandsaw but frequently they are incorrectly setup, resulting in poor or wandering cuts.
With a step-by-step approach Graham addressed the importance of correct blade selection, how many TPI (teeth per inch) a blade should have and why, both the tension and location of the blade to ensure accurate cuts. During the session, he also highlighted ways to reduce any wobbling that may exist in a machine and the corrective measures required to resolve it.
Lastly, he talked a little about blade width and the tightest radius of cut that was possible.
To illustrate many of these key points, Graham used a Carbatec BS-B200H bench top saw.
Station No. 2
Peter Banks was set up to talk about “fixings and finishing” and gave everyone an insight into the finer points needed to finish your project and being aware of either the best way to bring a shine to your brass or bronze screws by putting them into your drill, spin it up and used very fine abrasive to the head, and how to protect them using polyurethane or Inox MX3.
He talked a bit about Cutlers rivets, their application and how he uses them as a pivot point in some projects.
He briefly covered copper nails and brads with their use as clinched nails and the strength clinching adds to the join and talked about end grain glueing, and how you must first “pre-fill” the end grain with glue to get any sort of strength in the joint.
Station No. 3
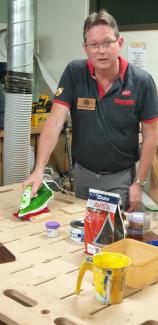
Geoff Glasson was set up in the workshop and talked about the different methods he uses to remove dings and damage from project pieces.
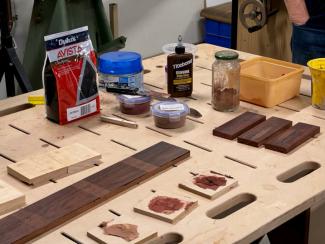
He showed a sample piece of pine with various defects - small hammer mark, large hammer mark, knife marks with and across the grain, and chisel damage with and across the grain.
Geoff first demonstrated adding moisture to the wood, letting it soak in briefly, covering the wood with a damp cloth then ironing it using a dedicated workshop clothes iron set to high temperature.
The result was that the heat and steam raised the grain enough that hammer marks were eliminated, and defects along the grain also diminished greatly.
Damage across the grain improved but still required filler. Geoff then talked about various fillers he has tried. First was wood glue and sawdust which he did not recommend. In his experience it did not work well. Second was epoxy with cement oxide as colouring agents. This worked better but he felt it looked too plastic and was better suited to highlight the defect rather than hide it. Last was to use a neutral-coloured builders bog with neutral coloured / white accelerant and cement oxide as a filler. This works much better and when done with care is hard to spot from the rest of the finish.
Editors note! For small defects when he is woodturning, Kevin uses a small amount of super glue which he immediately sands, this then takes on the colour of the timber he is working with and is obviously easier when you can sand it on the lathe.
Superglue and sanding can also be used to repair small defects in areas such as splits in thin timber such as “swallow tails” in shaker boxes.
Station No. 4
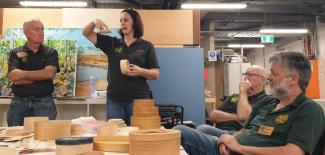
Carolyn and I chose the “business Class Lounge” thinking that you might pay more attention if you were comfortable? ( watch out for the hard wood seats next time!) We talked how much fun we had running the two day “Shaker Box “ workshop at Dwellingup last month. Making oval wooden boxes has been around for a long time and the process is not that difficult, all you need is a thin strip of straight grained timber and a former to bend it around.
Shaker boxes come in a wide range of sizes and once the timber bands have been in the bath they bend into shape remarkably easy, so that when nailed and dried they retain their shape. Once fitted with a top and bottom, which can be decorated if you wish, they are both as simple and functional as they were in the 1800’s.
Toys
We asked Neil Benett to bring along a preview of the amazing toy cars he has been building so that everyone could see some of what we have planned for our next meeting on 10th June.
Once again Carolyn and all of us at FWWA would like to thank everyone at LMCS for making more than welcome at their fantastic venue and we look forward to further join ventures in the near future.

